I still can’t believe I’m lucky enough to be writing a blog about how our IVF worked. I wrote a little about this last year, but anyone who knows me, knows that all I’ve ever wanted is to be a Mom. I’ve been dreaming about my little boy for as long as I can remember. I even just got teary-eyed when I typed out, “my little boy.”
IVF is a daunting, confusing process. Gunnar and I are fortunate in that we actually have two cousins who went through IVF and they’ve kindly given us support and information over the years (cousins – when you read this, please know we are endlessly grateful for you <3). Other than that, everything I learned about IVF prior to going through it, I gleaned from the internet.
Even with all the information on the internet, there are still a lot of blanks to fill when it comes to IVF with CF. I hope that by sharing our story, I can help fill in some of those blanks for others in the CF community who may be considering IVF. I also have a professional project in the works that will provide clarity and resources for CF families as they explore family planning pathways. Stay tuned for that – it’s a passion project that I’ve been setting up for quite some time!
My intention with this specific blog post is to be practical and transparent. I will share the various steps we had to take to get from first consult to positive pregnancy test. Feel free to leave a comment if you have any questions or if there is anything I can clarify!
I’ve organized this post in order of our IVF timeline – which was definitely skewed because of the pandemic, so take it with a grain of salt. “Elective” procedures were postponed all last spring, and we also pushed back a lot of appointments based on case rates in our area. All in all, our IVF process was about 10 months long. Without a pandemic, I think we could have done it all in about 4 months. We will always be grateful for our delayed timeline though, because it led us to the specific child we are having, who is no doubt meant to be in our arms.
The steps of IVF with CF:
- The initial consultation
- Baseline testing
- Sperm extraction
- Ovarian stimulation
- Egg retrieval
- Fertilization
- Embryo transfer
- Pregnancy test
Initial consultation:
Gunnar and I actually had our first fertility consultation two years ago, at Columbia Presbyterian Fertility Center in New York City. It’s an awesome facility, and we had initially thought we’d do our IVF there because there are no fertility clinics near us in New Hampshire. We did that consultation to get some information about what IVF would look like for us and when we should start. They essentially told us that sooner was better than later, so we made a tentative plan to do IVF in the summer of 2020, with the hopes of creating embryos to put in the freezer to use after getting married.
We all know what happened next… the pandemic came along, and by the summer of 2020, we no longer felt safe going for medical treatment in the heart of New York City. Last June, we ended up doing a virtual consultation with Boston-area-based Fertility Center of New England, which has a satellite clinic in New Hampshire about 80 minutes south of us. We instantly connected with our doctor and decided to move forward with her.
Hot tip: A couple years before we did IVF, my regular OBGYN made a comment that was along the lines of, “any fertility clinic is great these days – you don’t have to travel into a city to go to a hospital or research-based clinic like we would have recommended several years ago.” Still, our first consultation was with Columbia, a hospital-based clinic (and like I said, it was great). However, we ended up doing IVF with a private fertility clinic. Our consultation with the private clinic was free. My hot tip is that a lot of the private clinics (which compete with each other) offer free initial consultations – definitely something to look for if you’re beginning the IVF process.
Baseline Testing:
After our consultation, our fertility doctor, who will be referred to as “our RE” (reproductive endocrinologist) throughout the rest of the blog, prescribed some baseline testing for us.
Gunnar’s baseline testing:
Gunnar had to prove that he has no sperm in his ejaculate. He could have done this at our fertility clinic 80 minutes south of us, but it was much more convenient for him to do it at his CF clinic, which is 10 minutes away from us. The CF clinic was able to prescribe the test for him. He wrote about it in this blog post!
Darcy’s baseline testing:
The most important test I did was the CF Carrier Test, and if you take away anything from this blog post, it should be how to do the testing.
Let me start by saying that I tried to do CF carrier testing years ago, and neither my obgyn or Gunnar’s New York CF clinic knew how to test me for ALL the known mutations of the CFTR gene (there are about 1700 known mutations that may make one a CF carrier). CF carrier testing is very common, **but** most CF carrier testing only tests for the 400 or so most common mutations.
Fast forward to when we started doing IVF in New England, and our fertility clinic and Gunnar’s New Hampshire CF clinic were still unsure of how to test me for all of the known CF carrying genetic mutations.
Fortunately for us, we had the support of CF friends who have been through this process before and guided us. Here is what we did:
- We asked our fertility clinic to call Ambry Genetics, a California-based genetics company
- We told them to ask for test code 1007, which is called “CFTR seq and del/dup.” This is the comprehensive test, you can see it on the website here: https://www.ambrygen.com/providers/genetic-testing/61/exome-and-general-genetics/cystic-fibrosis
- Ambry genetics then sent me an at-home test kit, and I sent Ambry a tube of my spit
- We found out about 8 weeks later that I am NOT a carrier for CF (USPS lost my first test kit in the mail, and I had to re-do it. That’s why it took us 8 weeks)
If you need to get tested to see if you are a CF carrier – THIS IS THE WAY TO DO IT! I will also add that our insurance paid for the testing, which otherwise would have been about $800 I believe.
The three other baseline tests I needed were: (1) bloodwork on day 3 of my menstrual cycle, which looked at my hormones and checked for HIV antigen, hepatitis B surface antigen, hepatitis C antibody, and syphilis (this is the standard pre-IVF labwork), (2) an ultrasound on day 3 of my menstrual cycle, which evaluated the ovaries and pelvic organs at this specific time of the cycle, and (3) a sono-HSG on day 11 of my menstrual cycle, which is when they shoot dye up inside your uterus to take a look at the shape of the uterus and the openness of the fallopian tubes. Some people report this procedure as somewhat painful/crampy, but I had no pain.
Gunnar’s sperm extraction:
Gunnar already told this story on the blog!
Long story short, he had bloodwork done twice ahead of time to get a glimpse of how the sperm retrieval might go, and then he had a TESE procedure. I will say, I had thought they were going to extract the sperm with a needle and then we’d be handed a vial of sperm, but instead, they cut out a chunk of testicular flesh and we brought a test tube of the flesh from the urologist to the fertility clinic. The lab at the fertility clinic then extracted the sperm from the flesh, and we were able to get 4 vials of sperm out of it.
I also had been under the impression that Gunnar’s sperm extraction procedure would be on the same day as my egg retrieval, because it’s often done that way, but our fertility clinic did not want me to start my part of IVF until we could confirm Gunnar had usable sperm. We did his procedure two weeks before I started my ovarian stimulation process.
Ovarian stimulation
This is the part of IVF that many people consider “doing IVF.” In a regular menstrual cycle, the ovaries will release one mature egg. In an IVF cycle, the goal is to generate as many mature eggs as possible, to increase the likelihood of successfully fertilizing as many mature eggs as possible, so they can grow into embryos. For every egg that is harvested (the word “harvested” kinda weirds me out), you have to hope that as many eggs as possible are mature, then you have to hope that as many of the mature eggs are fertilized, then you have to hope that those fertilized eggs turn into usable embryos. On average, about 80% of retrieved eggs will be mature, 80% of those mature eggs will be fertilized, and about 30%-50% of the fertilized eggs will become blastocyst-stage embryos. The most viable embryos reach blastocyst stage after five days post-fertilization.
I started this process in February. I was prescribed birth control pills (which seems counterintuitive) and I took them for 18 days. The birth control pills allow the RE to manipulate *exactly* where you are in your cycle, so you can start the hormone injections at precisely the right time. During this time, Gunnar completed his sperm extraction, and we got the go ahead to order the medications I’d need to start ovarian stimulation.
I started the injections a little less than a month after I started the birth control pills. I was on a very low dose of the hormone injections (which are called follicle-stimulating hormones, or FSH), but man, the side effects were tough on me. Most people don’t have side effects from the FSH, other than bruising at the injection site (lower belly) and some bloating, but I had neurological symptoms within an hour after the first injection. Basically, I felt drunk for a week straight.
On average, women doing ovarian stimulation will take the FSH injections for about 12 days. During this time, the fertility clinic will closely monitor the woman with frequent ultrasounds and bloodwork. The monitoring was one of the worst parts for me because our clinic was so far away. All the monitoring has to be done before 7am so that the daily treatment regimen could be changed by noon, if needed. This meant I had to leave our house by 4:45am so I could get to the clinic on time to do my monitoring appointments.
This is when things became a little atypical for us. We had expected the ovarian stimulation period to last about 12 days. My body, however, reacted incredibly quickly to the FSH, and I was cut off from the FSH after just 6 days. The next step of the process happened a whole week earlier than we thought it would.
Egg retrieval and fertilization
The next step is sucking the eggs out of the ovaries! After my last night of FSH, I was given what is called a “trigger shot.” The trigger shot is a dose of human chorionic gonadotropin (hCG) that primes your eggs to reach maturity and preps your body for ovulation. The egg retrieval is done exactly 36 hours after the trigger shot, right before your body would ovulate on its own.
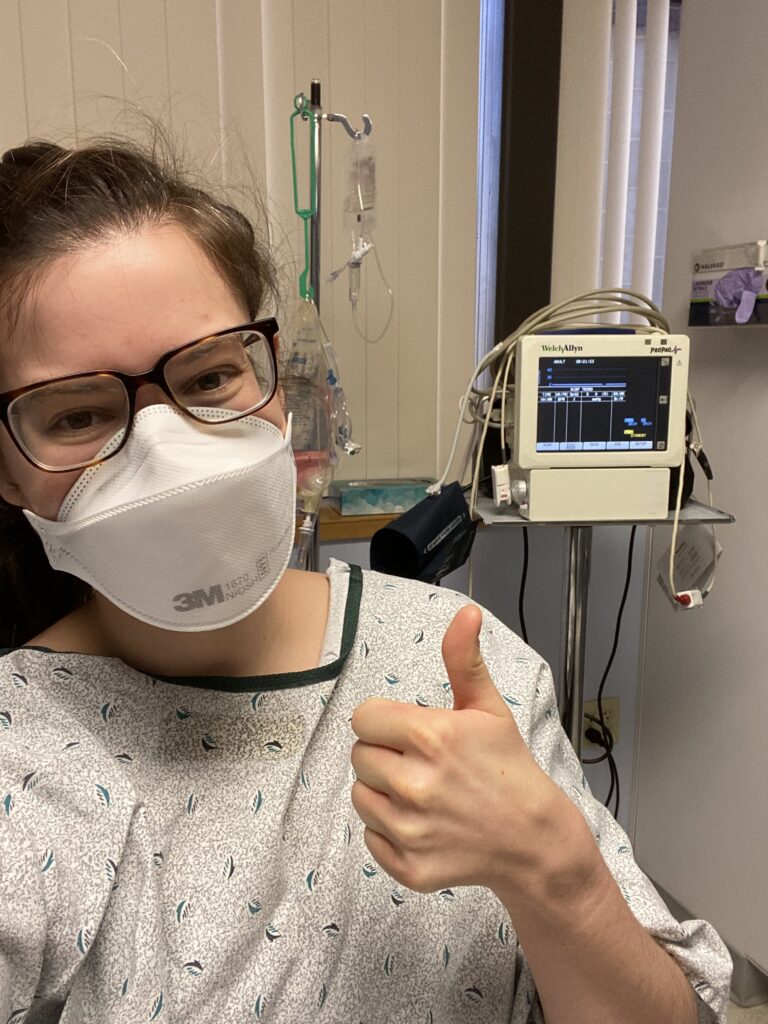
The egg retrieval is a minimally invasive procedure and is performed while the patient is under anesthesia. The RE goes into the ovaries with a needle attached to a catheter and literally sucks the eggs out. The anesthesia is an intravenous sedation medication, so once the eggs are retrieved during a 20-30-minute process, you wake up. I was told that the egg retrieval process is painless for most people, albeit for some cramping. I woke up from the procedure with pain that was about a 6-7 on a scale of 1-10, and the incredibly attentive nurse dosed me right up with some fentanyl. After about 15 -20 minutes of relaxing on the fentanyl, I felt much better and Gunnar was able to come retrieve me from the outpatient suite (he otherwise was not allowed inside for any of my appointments because of covid precautions). The 2-hour drive home was pretty painless (my monitoring appointments were at the NH satellite clinic 80 minutes south of us, but we had to go to the Boston suburbs for all of our procedures). My ovaries were sore for about a week, but overall, recovery was easy.
Once the eggs are out, the embryologist checks to see how many of the eggs are mature enough to be fertilized with sperm. It’s important to note that the fertilization process is different in CF-IVF cases. In conventional IVF fertilization, a whole lot of sperm is put into a petri dish with the egg. After swimming around for a while, a single sperm will fertilize the egg on its own. The sperm retrieved from a man with CF isn’t great at swimming, so the egg is fertilized using a process called intra-cytoplasmic injection, or ICSI for short. With ICSI, one sperm is directly injected into the egg using a needle and a microscope. ICSI is commonly used when there are male-factor infertility issues, or when a couple has IVF failure when using the conventional fertilization method.
Embryo Transfer
We did what is called a fresh embryo transfer, meaning one of our embryos was transferred into my body five days after the egg retrieval. Lots of people choose to do a frozen embryo transfer, meaning the embryo is frozen on day five and transferred in the future. There is a lot of debate on whether a fresh or frozen transfer is likelier to work, but I’ll save that discussion for another blog. When we asked our RE if we should do a fresh or a frozen transfer, she said, “let’s do a fresh, why not!”
One reason people do frozen transfers is so that they can do genetic testing on the embryos. Since I am not a carrier for CF, we did not pursue genetic testing on our embryos. Had I been a carrier of CF, we would have done genetic testing on the embryos to specifically look to see which, if any, embryos would carry a CF diagnosis. We would have then chosen to implant a different embryo, if we had any non-CF embryos. Other people do this genetic testing to see if the embryos are chromosomally normal. Our RE recommended we forgo this kind of testing given our age. Being under 30, our embryos had a very high chance of being chromosomally normal, and the science behind this kind of testing is foggy anyway (I will link to articles if anyone is interested in this). Honestly, we had assumed we would do the testing until our RE suggested we didn’t need to. Had we gone ahead with it, it would have cost about $3000-$6000 out of pocket. Our RE said it would have taken about 5-6 weeks to get the test results, after which we would have been able to go ahead with a transfer pretty much right away.
One potential perk of doing genetic testing is that you can find out the sex of the embryos, if you wish. Since we did not do genetic testing, this also means we did *not* choose the sex of our child, and we do *not* know the sex of the embryos we have in the freezer. I don’t judge anyone who chooses the sex of the embryo they want to implant, but our specific clinic would not have allowed us to choose, even if we knew the sex from genetic testing (they only allow for “family balancing,” which means you have to already have a child of a certain sex to be able to choose what sex you wish to implant). Even so, I will emphasize, we do not know the sex of our other embryos, so we will not be choosing the sex in the future, either. I’m including this info in the blog post, because there are a handful of celebrities who are very public about doing IVF so they can choose the sex of their child.
Regarding the actual embryo transfer process, it’s almost laughably easy. Even though it feels like the most critical part of the whole IVF ordeal, I was in and out of the office in about 20 minutes. I went to our clinic (again, sans Gunnar), got set up in what looked like a regular doctor’s exam room, and an ultrasound technician came in to check out my progesterone lining (ideally, your lining should be over 8mm thick for transfer, if I remember correctly mine was about 11mm). Then, the RE came into the office and prepared the catheter she would use to shoot the embryo up into my uterus. Finally, the embryologist came in with the embryo, in a syringe, ready to be launched into the catheter. The ultrasound tech had my uterus on screen for the RE to be able to guide the cathether appropriately, and the team of three did the transfer in what amounted to a 10 second process. I was then allowed to immediately get up and leave. I was PUPO!! (Pregnant until proven otherwise)
Pregnancy test
In almost all IVF cases, a blood pregnancy test is performed at the fertility clinic ten days after the embryo transfer. This gives the embryo enough time to implant so that human chorionic gonadotropin (hCG) can be detected in the blood (yes, this is the same hormone they use for a trigger shot!). It is not recommended that you take an at-home urine pregnancy test before this point, because the at-home tests are not as sensitive in detecting the hCG and can produce a false negative.
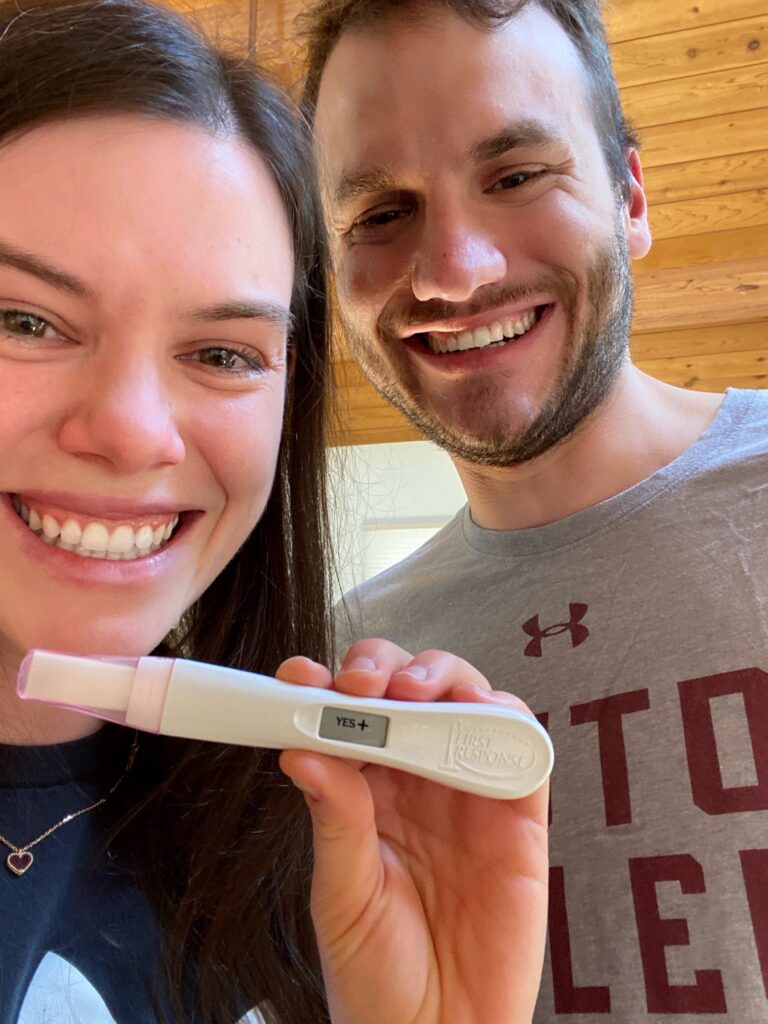
Naturally, I didn’t listen to this guideline and took an at-home pregnancy test just five days after my embryo transfer. I knew I was pregnant. I even think I felt the moment the embryo implanted (I had about ten seconds of sharp pelvic pain about 36 hours after the transfer). I also was absolutely exhausted for those five days and fell asleep by 8:30pm every night. I felt in my bones that the transfer had worked, so I took a test. I didn’t tell Gunnar I was taking the test, in case it was negative or a false negative. When the test came back positive, I immediately started crying and ran to tell Gunnar. Poor Gunnar had about three minutes to process the news before he had to log in to a zoom class, oops! It was one of the best moments of our lives.
When I went for my blood test on day ten, it was positive. The standard procedure is to do another blood pregnancy test a week or so later to see if the hCG levels are increasing appropriately (it should double every 24-48 hours), and that was a happy test for us, too.
We were thrilled! At that point, we decided to keep it all a secret from everyone…
Post-IVF
One thing to note about IVF – the needles don’t stop after the positive pregnancy test! The egg retrieval/transfer procedure inhibits the body’s ability to produce progesterone, and progesterone is vital for healthy fetal growth during the first trimester. Standard practice in IVF is to give all women progesterone supplementation until around week 10 of pregnancy. Most women (myself included) receive the supplementation via injection (upper butt/hip area), though vaginal suppositories are another option. These shots were relatively painless, but after ten weeks of them, my butt was quite sore.
Cost
I said I was going to be transparent – our IVF cost about $13,000. Our insurance does not cover infertility treatments, though it covered some of the “diagnostic” procedures, like our baseline testing.
Our IVF itself was about $10,000, and then the medications needed for ovarian stimulation were about $3000.
We will also be paying for storage for our frozen embryos, which is about $500 a year.
Had we gone ahead with genetic testing of the embryos, it would have cost about $3000-$5000 more (the price depends on how many embryos you send for testing)
Gratitude
All told, we are incredibly, incredibly grateful for how our IVF process went. We know just how lucky we are that we got pregnant on our first attempt.
And then, to be able to break the news to all our closest loved ones at the same time at our wedding… that was just the best moment of our lives. Keeping it all a secret was HARD, but so worth it for that moment!!
We love our little boy so much.
Gunnar and I are both very passionate about opening family building pathways for CF families. We have some projects already in the works, and a lot of ideas about how to make these pathways more accessible. We will keep you posted!
My next blog post will be about all the different things I did to prepare for IVF ahead of time, in an attempt to increase our odds of success. In the meantime, please know I’m happy to try to answer any clarifying questions in the comments, so fire away if you have any!